
PRODUCTION JOCELYN
Before filming our teaser trailer, we did test shots, to familiarise ourselves with the equipment so that when we start filming our trailer, it should less time to capture the shots and new skills we have learnt can be applied e.g. camera settings, use of lights and its positions.
In terms of filming our teaser trailer, our college provided us with the equipment and it was basically down us how we use the equipment to film our trailer, e.g. positions or amount of lighting. We used five main pieces of equipment: a Canon 7D EOS Digital Film Camera, Kinoflex video lights: 400V Diva-Lite and the 2-unit version, tripods for the lights as well as a zoom H2 handy recorder (professional tripod) for the camera.
 Canon EOS 7D Film Camera
Professional Camera Tripod


KinoFlo Lights Tripod
Canon EOS 400D (Photography Camera)

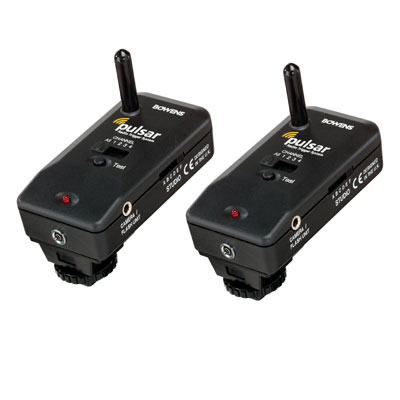
Bowens Pulsar; Radio Trigger
Throughout the filming of the trailer, the setting on the camera remained on Manual so as allow several settings to override each other, which in effect gives us more control over adjusting the settings according to our location, its conditions and the subject we filming. To control the lighting that enters the camera, we adjusted the aperture or ISO. By increasing the aperture, this allows more light to enter and so reducing the aperture decreases the amount of light that enters the camera. We found ourselves reducing the aperture in open areas, where we already had access to natural light not mention the fact we used artificial lighting. In locations that were isolated e.g. the shot with Stacey in an isolated corner required us to increase the aperture slightly. Even with this knowledge of lighting, we still found it difficult to reduce the reflection of the light from the Kino flo lights. In locations that already had natural light entering, using a reflector proved most effective. In dark locations the reflection of light proved very hard to control.
Throughout the filming of the trailer, the setting on the camera remained on Manual so as allow several settings to override each other, which in effect gives us more control over adjusting the settings according to our location, its conditions and the subject we filming. To control the lighting that enters the camera, we adjusted the aperture or ISO. By increasing the aperture, this allows more light to enter and so reducing the aperture decreases the amount of light that enters the camera. We found ourselves reducing the aperture in open areas, where we already had access to natural light not mention the fact we used artificial lighting. In locations that were isolated e.g. the shot with Stacey in an isolated corner required us to increase the aperture slightly. Even with this knowledge of lighting, we still found it difficult to reduce the reflection of the light from the Kino flo lights. In locations that already had natural light entering, using a reflector proved most effective. In dark locations the reflection of light proved very hard to control.
In this behind the scenes shot, the corridor is isolated and lacks natural light, light proves very hard to balance.


 |
Something we gained more knowledge on is white balance. As the camera has a built in auto white balance imaging sensor, we placed a blank piece of A4 paper in front of the camera lens, so that it recognises the white colour, and maintains the setting. We also adjusted the WB bracketing; +/-3 (three single levels) according to the lighting conditions in the area we filmed in.
In terms focusing the camera, we used a manual focus, and for close-up shots an evaluative focus meter that allows us to decide what we want the focus to be on via the use of spots. This something new we had to learn about. Evaluative focus meter setting was very useful when filming our opening shot. Click the link to see opening shot in our trailer;http://www.youtube.com/watch?v=WlOmEukRZ4Y
Using the Kino flo 400V and 800 V Diva Lite and the 2- unit version lights was very difficult and took us very long time to ensure the set was lit sufficiently and the main character remains lit and the focus of action. Getting the lights in positions that reduces dark spots in the setting was very difficult, we often found ourselves adjusting the camera setting and moving around the lights, which was a very time consuming process. After filming two or three shots we began to understand lighting a bit more. The Diva Lite’s enabled us to adjust the intensity of the light; we could make lighting the setting dimmer or brighter, the benefit of this is that it helps us avoid the light appearing exaggerated and unrealistic. The Diva Lite’s can also rotate portrait or horizontal, this helps balance the distribution of lighting and allows us to control what direction we want the light to hit Stacey’s face.
The counting in and out at the beginning the end of shots was very important and required the camera person to ; count down from three to one and start filming the shot at two and say action. It was very important, as it marks where the shot starts, to be able to make cuts or changes to shots during editing. The end of each shot was indicated by saying ‘cut’, or indicted by saying something conclusive, e.g. ‘that was great’, ‘prefect’ or ‘cool’ this was also done for editing purposes.
The health and safety of others when using the equipment was a major factor we had to consider and think carefully about when filming our trailer; this was especially important as our test shots and running shots for the trailer were filmed in the corridor. The problem with filming in the corridor can pose a serious risk on students or staff moving in and out of the corridor. What we did to reduce this risk is align the cables by the wall and tried to keep the extension cables in the cable reel, to prevent people tripping over it and potentially damaging our equipment. Something we also had to take into consideration is the set up and the removing of equipment when finished. Before filming we had to ensure the locations for filming were clear and not in use. We filmed all our shots during times when the majority of students are in lessons; this in effect controls the amount of people who may move in or out of our set and also helps reduce any potential health and safety risk. The benefit of us doing test shots meant that when we actually started filming our trailer, it would take a shorter time, which it did and so reduces potential risks posed at people moving around or through our film set. Before using the equipment we had to complete a booking form, which included sections that we had to fill out regarding, possible dangers to us and others that we need to be aware of and where equipment will be used and how it will get to its destination. A booking form had to be completed every time media equipment was required that being; lights, tripods, Canon 7D film camera and Cannon 400D, as there is a limited amount of equipment that needs to be shared amongst media students and is a fair way of distributing equipment.
 Photography
We used a Canon EOS 400D to photograph one of our posters; the sink shot and we used the Canon 7D to photograph our magazine cover and our other poster; close-up of Stacey. A Bowens Pulsar; Radio trigger and flash lamp. The 7D camera was used for magazine cover, as it was available at the time otherwise the 400D would have been used throughout. The benefit of using the 7D is that it has a live view and images come out clear and crisp, because of the large variety of settings to choose from in comparison to the 400D.
In terms of lighting, we used a soft box on both our magazine cover and posters, as it helps distribute lighting evenly, in way that the light appears soft, delicate on a person’s face, in this case Stacey’s face. By using a Bowens Gemini Esprit GM 500 flash unit, and connecting it up to the softbox, this effectively enhanced the quality of the lighting and the appearance of Stacey's face close-up. Her face appeared flawless, radiant and soft on camera from the use of the technical equipment.
The poster shots were captured in my media classroom, which is also a studio. The softbox was positioned closer to Stacey and the flash lamp parallel but slightly further away so that the light doesn't appear too harsh on camera. This was also deliberately done to create the effect of Stacey emerging from dark, which will in effect create a dark tone, around our trailer.
Click this post to view our raw posters before photoshop manipulation;
http://motionlesspictures010.blogspot.com/2011/01/film-posters-and-magazine-cover-raw.html
We also used a Radio trigger, which works by sending a signal from the camera to the softbox that triggers the flash (shown above).
POST-PRODUCTION JOSHUA
Feedback:
ReplyDeleteone of your pictures shows a tripod, but the caption says it is a zoom 2 sound recorder. can you correct this please.
in the second paragraph, you have a problem with phrasing which is unclear- " we filmed many takes of the same shot were as so..." this doesn't make any sense- please clarify.
You need to write more on the photography element of this question- you simply haven't given enough information on how you lit these images, which are really beautiful. the soft box will do nothing on its own, so presumable you connected it to the Bowens Gemini Esprit GM 500 flash unit, but you should also provide a diagramme of where the light was positioned in relation to the model and the photographer.
please work on this, as if you can communicate more information it will really improve your evaluation mark.